Become a Certified Pain-Free Performance Coach.

20,000+

4.9

Beginner-Friendly
Course curriculum

6 Modules

354 Lectures
Welcome to Pain-Free Performance

8 Lectures

L01
Welcome to Pain-Free Performance
L02
Download: Certification Manual
L03
The Pain Problem
L04
Your Instructor Team
L05
What is "Pain-Free"?
L06
What is "Performance"?
L07
Pain-Free Performance is Health
L08
Pain-Free Performance Roadmap
Principles of Pain-Free Performance
33 Lectures
L01
01. Principles of Pain-Free Performance
L02
The Importance of Form Part 1
L03
The Importance of Form Part 2
L04
Motor Control
L05
Motor Unit Recruitment
L06
Movement Mastery Mindset
L07
Components of Movement Mastery
L08
The Reliable Autopilot
L09
Movement Mastery Framework
L10
Motor Learning
L11
Rate of Motor Learning
L12
How You Move Becomes the Way You Move
The Pillar
14 Lectures
L01
The Pillar
L02
The Pillar Complex
L03
Managing Tension
L04
Hip Centration
L05
Shoulder Centration
L06
Neutral Zone
L07
Stabilizing the Pillar
L08
Pillar Drill 1: Supine Cough
L09
Pillar Drill 2: Front Plank
L10
The Cueing Sequence
L11
Pillar Drill 3: Standing Brace
L12
Bracing Strategies
L13
Scaling Tension to Load
L14
Scaling Tension to Pain
Breathing Strategies
7 Lectures
L01
Download: Breathing Strategies eBook
L02
Prone Corrective Breathing Demo
L03
Double Breath Technique Demo
L04
Supine 90/90 Parasympathetic Breathing Demo
L05
Sympathetic Huff Breath Demo
L06
Rhythmic Breathing Demo
L07
Tactical or Box Breathing Demo
The 6-Phase Dynamic Warm Up
114 Lectures
L01
02. The 6-Phase Dynamic Warm Up
L02
Never Waste Another Warm Up
L03
The 6-Phase Dynamic Warm Up Intro
L04
The 6-Phase Dynamic Warm Up Origin Story
L05
Preparation Tenets
L06
Ritualistic vs Results-Based Practice
L07
Never Skip the Warm Up!
L08
The Central Nervous System
L09
Dynamic Warm Up Sequence
Phase 0
8 Lectures
L01
Phase 0
L02
Phase 0 – When?
L03
Minimum Effective Dosage
L04
Pre-Dynamic Warm Up Routine
L05
Warm Up Focus
L06
Performance Recovery System
L07
When to Use Recovery
L08
Hierarchy of Recoverability
Phase 1 – Soft Tissue Techniques
19 Lectures
L01
Phase 1 – Soft Tissue Techniques
L02
Goal of Soft Tissue Techniques
L03
Foam Rolling Myths
L04
How SMR Works
L05
2 Fundamental SMR Techniques
L06
Soft Tissue Considerations
L07
One Tool Rule
L08
SMR Regions
L09
Warm Up vs Recovery
L10
SMR Quads
L11
SMR Lateral Hip (TFL)
L12
SMR Adductor
L13
SMR T-Spine
L14
SMR Pecs
L15
SMR Posterior Shoulder
L16
SMR Glutes
L17
SMR Hamstrings
L18
SMR Calves
L19
SMR Ball Feet
Phase 2 – Biphasic Positional Stretching
21 Lectures
L01
Phase 2 – Biphasic Positional Stretching
L02
Flexibility vs Mobility
L03
Goals of Stretching
L04
Stretch Myths
L05
How Stretching Works
L06
2 Fundamental Stretch Techniques
L07
Stretching Considerations
L08
Tight Hamstring Myth
L09
1/2 Kneeling Hip Flexor Stretch
L10
Adductor Rockback Stretch
L11
Dynamic Pigeon Stretch
L12
90/90 Chest Stretch
L13
Hinged T-Spine & Bilateral Lat Stretch
L14
Posterior Shoulder Stretch
L15
1/2 Kneeling Soleus Stretch
L16
Standing Wedge Calf Stretch
L17
Quad Stretch with Strap
L18
1/2 Kneeling Hip Flexor Lateral Reach
L19
Supine Hamstring Stretch with Strap
L20
World's Greatest Stretch
L21
Note on Hypermobility
Phase 3 – Corrective Exercise
15 Lectures
L01
Phase 3 – Corrective Exercise
L02
Goals of Corrective Exercise
L03
5 Common Linchpins
L04
Motor Control Gap Theory
L05
Caution with Correctives
L06
The 3 S's
L07
Corrective Guidelines
L08
Reframing Success
L09
Correctives Everyone Needs
L10
Dead Bug
L11
Quadruped T-Spine Rotation
L12
Side Plank
L13
Quadruped Variations
L14
Crawling
L15
Corrective Programming
Phase 4 – Activation Drills
12 Lectures
L01
Phase 4 – Activation Drills
L02
Goals of Activation
L03
Position for Authentic Activation
L04
Activation Drill Guidelines
L05
Go-To Activation Drills
L06
Glute Bridge
L07
Single Leg Glute Bridge
L08
Side Plank Hip Thrust
L09
Hinged Band Pulldown
L10
Tri-Set 1: Band Over & Back
L11
Tri-Set 2: Band Face Pull
L12
Tri-Set 3: Band Pull Apart
Phase 5 – Movement Pattern Development
15 Lectures
L01
Phase 5 – Movement Pattern Development
L02
Goals of Movement Pattern Development
L03
The Reliable Autopilot
L04
Cueing Considerations
L05
Movement Pattern Development Guidelines
L06
Phase 5 Bodyweight Squat
L07
Movement Screening
L08
Goblet Squat
L09
RDL
L10
Split Squat
L11
Reverse Lunge
L12
Single Leg RDL
L13
Push Up
L14
Inverted Row
L15
Movement Pattern Practice
Phase 6 – Central Nervous System Stimulation
15 Lectures
L01
Phase 6 – Central Nervous System Stimulation
L02
Goals of CNS Stimulation
L03
Use It or Lose It
L04
Post-Activation Potentiation
L05
Phase 6 Guidelines
L06
Bent-Over Med Ball Press
L07
Med Ball Slam
L08
Med Ball Rotational Throw
L09
Med Ball Rotational Toss
L10
Med Ball Rotational Chest Pass
L11
Vertical Jacks
L12
Seal Jacks
L13
Vertical Jump
L14
Skips
L15
Sprints
The 6 Foundational Movement Patterns
165 Lectures
L01
The 6 Foundational Movement Patterns Intro
L02
The Squat Pattern
L03
The Hinge Pattern
L04
The Lunge Pattern
L05
The Push Pattern
L06
The Pull Pattern
L07
The Carry Pattern
L08
Movement Tenets
L09
Movement System
L10
Train All 6 Patterns
L11
Rotation: The Interconnected Pattern
L12
Screen the Pattern
L13
Movement Screening Considerations
L14
Purpose & Practicality
L15
Assess the Pattern
L16
Optimization Strategies
L17
Principle Stage Progressions
L18
Adopt A Movement Mastery Mindset
L19
Download: Optimization Strategies eBook
Squat
23 Lectures
L01
Squat – The Most Butchered Movement Pattern
L02
Screening the Squat
L03
Squat Screen Considerations
L04
Hip Anthropometry
L05
Squat Assessment Intro
L06
Squat Assessment Part 1
L07
Squat Assessment Part 2
L08
Squat Assessment Part 3
L09
Squat Assessment Demo
L10
Non-Authentic Squats
L11
Using the Squat Wedge
L12
Ankle Mobility Screens
L13
Ankle Mobility Screen Results
L14
Squat Compensation: Anterior Pelvic Tilt
L15
Squat Compensation: Knees Rotate Inward
L16
Squat Compensation: Low Back Rounding
L17
Squat Pattern Pyramid
L18
Bodyweight Squat
L19
Goblet Box Squat
L20
Goblet Squat
L21
Barbell Front Squat
L22
Barbell Back Squat
L23
Squat Programming
Hinge
18 Lectures
L01
Hinge – The Most Forgotten Movement Pattern
L02
Screening the Hinge
L03
What is a Pure Hinge?
L04
Hinge Assessment Intro
L05
Hinge Assessment: The Pure Hinge Back Test
L06
Hinge Assessment: Hinge Stances
L07
Hinge Assessment: Hybrid & Sumo Stances
L08
Hinge Compensation: Anterior Pelvic Tilt
L09
Hinge Compensation: Lumbar Flexion (Lower Back Rounds)
L10
Hinge Compensation: Forward Knee Movement
L11
Hinge Pattern Pyramid
L12
Bodyweight Hinge
L13
Pull Through
L14
Romanian Deadlift
L15
Trap Bar Deadlift
L16
Barbell Deadlift
L17
Grip Considerations
L18
Hinge Programming
Lunge
29 Lectures
L01
Lunge – The Most Neglected Movement Pattern
L02
Screening the Split Squat
L03
Screening the Lunge
L04
Screening the SL RDL
L05
Lunge Assessment Intro
L06
Lunge Assessment: TF Ratio
L07
Lunge Assessment: Hip Flexion Range
L08
Lunge Assessment: Midline Position
L09
Lunge Assessment Findings
L10
Lunge Compensation: Anterior Pelvic Tilt
L11
Lunge Compensation: Forward Knee / Heel Lift
L12
Lunge Compensation: Hip Shift / Unwanted Rotation
L13
Lunge Pattern Pyramid Level 1
L14
Lunge Pattern Pyramid Level 2
L15
Lunge Pattern Pyramid Level 3
L16
Bodyweight Split Squat
L17
Deficit Split Squat
L18
Bulgarian Split Squat
L19
Reverse Lunge
L20
Forward Lunge
L21
Forward Walking Lunge
L22
Single Leg Romanian Deadlift
L23
Skater Squat
L24
Pistol Squat
L25
Lunge Load Progression
L26
Non-Alternating vs Alternating
L27
Step Up Progression
L28
Lateral Lunge
L29
Lunge Programming
Push
26 Lectures
L01
Push – The Most Overtrained Movement Pattern
L02
Screening the Push
L03
Push Up Screen
L04
Push Assessment 1: Shoulder Scour
L05
Shoulder Scour Test
L06
Scour Asymmetries
L07
Push Assessment 2: OH ROM Test
L08
Overhead Range of Motion Test
L09
Where Do Dips Fit In?
L10
Open vs Closed Chain
L11
Push Compensation: Shoulders Elevate
L12
Push Compensation: Elbows Flaring Out
L13
Push Pattern Pyramid Intro
L14
Push Pattern Pyramid – Horizontal
L15
Push Pattern Pyramid – Vertical
L16
Push Up
L17
Deficit Push Up
L18
Loading the Push Up
L19
Dumbbell Bench Press
L20
Incline Press
L21
Barbell Bench Press
L22
Landmine Press
L23
Dumbbell Overhead Press
L24
Pike Push Up
L25
Barbell Overhead Press
L26
Push Programming
Pull
25 Lectures
L01
Pull – The Most Misunderstood Movement Pattern
L02
Importance of the Pull Pattern
L03
Screening the Pull
L04
Pull Assessment Intro
L05
Pull Assessment 1: Thoracic Rotation Intro
L06
Pull Assessment 1: Thoracic Rotation Part 1
L07
Pull Assessment 1: Thoracic Rotation Part 2
L08
Pull Assessment 2: Shoulder Rotational Arc Intro
L09
Pull Assessment 2: Shoulder Rotational Arc
L10
Pull Assessment 2: Shoulder Rotational Arc Results
L11
Pull Compensation: Elevated Shoulders
L12
Pull Compensation: Rib Flare
L13
Pull Compensation: Hips Sagging
L14
3 Keys for Long-Term Shoulder Health
L15
Pull Pattern Pyramid
L16
What About Face Pulls?
L17
Inverted Row
L18
Single Arm Row
L19
Bent-Over Row
L20
Row Variations
L21
High-Angle Row
L22
Lat Pulldown
L23
Pull-Up
L24
Eccentric Pull-Ups
L25
Pull Programming
Carry
25 Lectures
L01
Carry – The Full-Body Functional Movement Pattern
L02
Load vs Speed
L03
Screening the Carry
L04
Carry Screen Checklist
L05
Carry Screen: Feet and Knees
L06
Carry Screen: Knees and Hips
L07
Carry Screen: Hips and LPJ
L08
Carry Screen: Lumbar and Thoracic Spine
L09
Carry Screen: Thoracic Cage and Shoulders
L10
Carry Screen: Elbows and Wrists
L11
Carry Screen: Head and Neck
L12
Carry Assessment Intro
L13
Carry Assessment: Confirm Compensations
L14
Carry Assessment: Performance Benchmarks
L15
Carry Assessment Levels
L16
Why Body Composition Matters
L17
Carry Assessment
L18
Why Grip Matters
L19
Carry Pattern Pyramid
L20
Carry as Real-Time Assessment
L21
Farmer's Carry
L22
Front Rack Carry
L23
Overhead Carry
L24
Cross-Body Carry
L25
Carry Programming
Programming
33 Lectures
L01
Pain-Free Performance Programming Intro
L02
Download: Pain-Free Performance Programs eBook
L03
6 Physical Characteristics
L04
In this section…
L05
Training Tenets
L06
6 Components of Each Workout
L07
Wave Loading A Session
L08
Pre-Training Preparation
L09
Priming & Potentiation
L10
Key Performance Indicator (KPI)
L11
What About 1RM?
L12
Filler Sets
L13
Accessories
L14
Accessories Quick Tips
L15
Conditioning Finisher
L16
Cardio vs Conditioning
L17
Post-Training Cool Down
L18
Putting It All Together
L19
Session Outline
L20
Muscles In Movement Patterns
L21
Optimizing Exercise Selection & Ratios
L22
Training Frequency
L23
Intelligent Progression
L24
Set Volume
L25
Purpose, Precision, Personalization
L26
Preparation Programs
L27
Recovery Programs
L28
Program Templates
L29
How to Read the Programs
L30
BW, Bands & DBs Program
L31
3-Day Full Body Program
L32
4-Day Upper-Lower Program
L33
5-Day Movement Pattern Split Program
Certification Credential Quiz
1 Lecture
L01
Pain-Free Performance Specialist Certification Exam
Meet john, Your Instructor
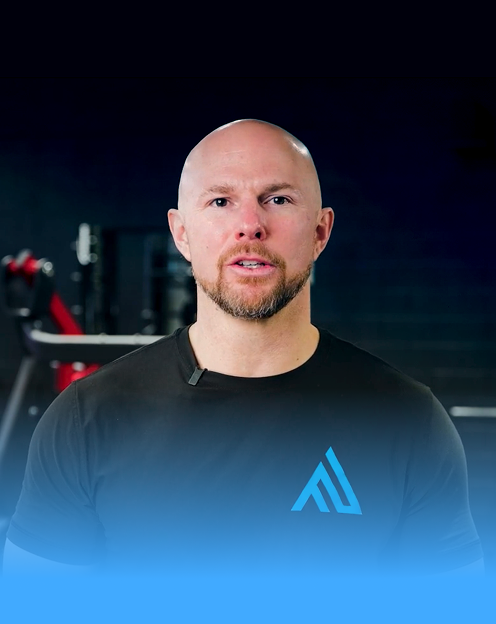
Dr. John Rusin
Founder of Pain Free Performance
Dr. John Rusin is a performance and pain-free training educator known for turning complex “what hurts?” problems into clear coaching decisions. Inside PFP, he’ll teach you a simple, repeatable framework to assess, coach, and progress clients safely.
Read John’s Letter.